Start by checking coolant levels, leaks, and fuse; then recharge or repair components as needed.
I’ve spent years fixing car A/C systems and teaching drivers simple repairs. If you’re asking how to fix my air conditioner in my car, this guide walks you through clear diagnostics, safe DIY repairs, and when to call a pro. You’ll learn common causes, the tools to keep on hand, step-by-step checks, and practical tips from hands-on experience so you can get cool air back fast.
Common causes of A/C failure and what they feel like
Most car A/C problems come from a few repeat issues. Low refrigerant, leaks, failed compressors, blown fuses, and clogged cabin filters are the usual suspects. Each problem has telltale signs like weak airflow, warm air, odd smells, or grinding noises.
- Low refrigerant often feels like weak cooling that gets worse over time.
- Leaks leave oily spots under the car and cause steady pressure loss.
- Failed compressors can make loud clunks or no engagement at all.
- Electrical faults often result in the A/C not turning on or behaving intermittently.
I once ignored a faint hissing sound and lost cooling over a week. A small leak at a rubber hose clamp was the cause. Fixing it was cheap and quick, but catching it early saved the compressor. Knowing these signs helps you decide how to fix my air conditioner in my car before small issues grow.
Tools, supplies, and safety basics
Before you try to fix my air conditioner in my car, gather the right tools. You need basic hand tools, a manifold gauge set, a vacuum pump or a recharge kit, safety glasses, and gloves. Having the right refrigerant type for your vehicle is crucial.
- Safety glasses to protect eyes from refrigerant and debris.
- Gloves to avoid cuts and cold burns from refrigerant.
- Manifold gauge set to read pressures and diagnose leaks.
- Refrigerant (R-134a or R-1234yf depending on your car) and a recharge kit if appropriate.
- Multimeter to test fuses, relays, and wiring.
Never vent refrigerant to the atmosphere. Handling refrigerant improperly is illegal and harmful to the environment. If you’re unsure about the refrigerant type or system pressure, get professional help. I recommend double-checking your owner’s manual for refrigerant specs and fuse locations.

Step-by-step diagnostic and repair process
Follow a clear workflow when you want to know how to fix my air conditioner in my car. Start with simple checks and move to technical steps only if you’re comfortable.
-
Check the basics
- Turn the A/C on with the engine running and set to cold.
- Look for obvious issues: no blower, no cold air, unusual noises.
- Verify fuses and A/C relay in the fuse box with a multimeter.
-
Inspect cabin air filter and vents
- Remove and inspect the cabin filter.
- Replace if dirty; restricted airflow can mimic A/C failure.
- Clean vents and blower intake from leaves and debris.
-
Measure system pressures
- Connect the manifold gauge set to the service ports.
- Compare low- and high-side pressures to the expected range for your refrigerant.
- Low pressure typically signals low refrigerant or a leak.
-
Look for leaks
- Inspect hoses, fittings, the condenser, and evaporator area for oil residue.
- Use UV dye and a UV lamp to pinpoint small leaks.
- Tighten loose clamps and replace cracked hoses or O-rings.
-
Test compressor operation
- With the A/C on, check if the compressor clutch engages.
- If clutch won’t engage but electricals are fine, compressor or clutch coil could be bad.
- A seized compressor often causes odd noises and no cooling even with proper refrigerant.
-
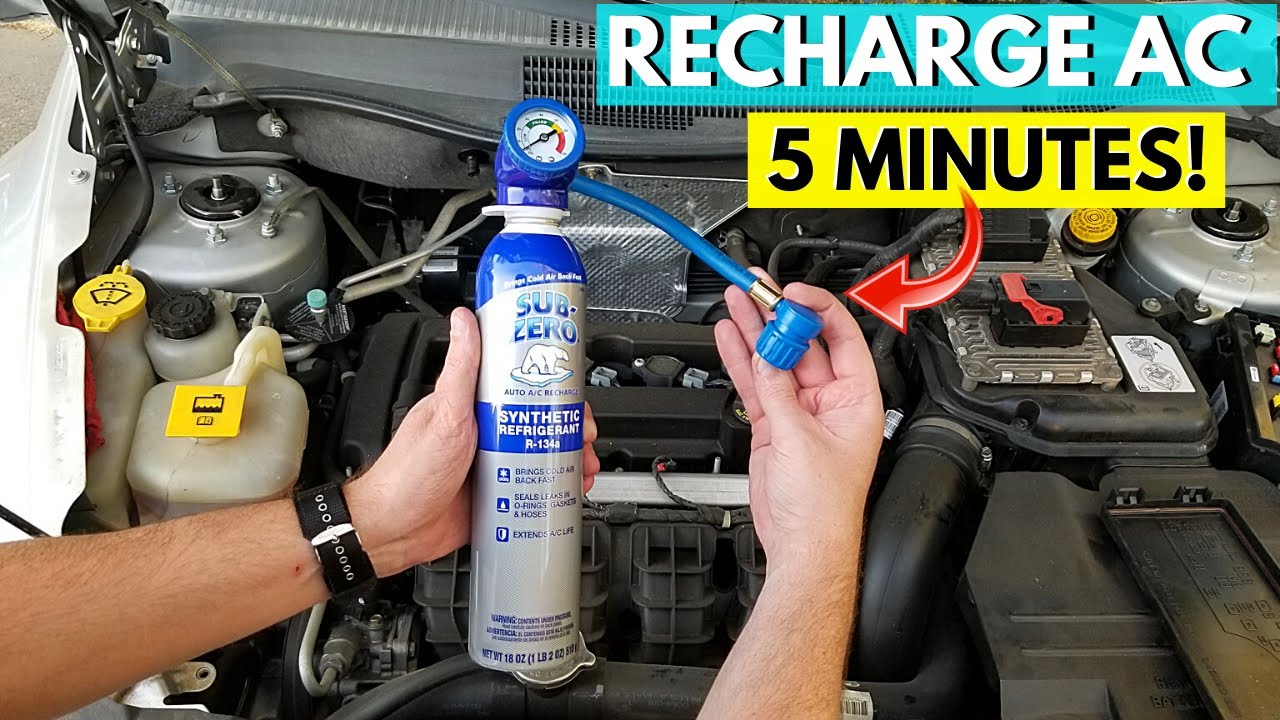
Recharge and test
- If no leaks are found and pressure is low, recharge with the correct refrigerant.
- Follow the recharging kit instructions and avoid overcharging.
- Re-check pressures and cabin temperature after recharge.
I once diagnosed a car with warm air and normal electricals. A clogged orifice tube was behind it. Replacing that small part restored full cooling. That case shows why step-by-step checks are the best route to fix my air conditioner in my car.

Common repairs and parts replacement guide
When you know how to fix my air conditioner in my car, you’ll often replace a few parts. Some repairs are easy at home; others need professional tools or skills.
- Cabin filter replacement
- Quick, low-cost, and often restores airflow.
- Refrigerant recharge
- Simple with a can-kit for minor top-offs when no leaks exist.
- Hose and O-ring replacement
- Replace damaged hoses and o-rings to stop leaks. Use correct lubricant on O-rings.
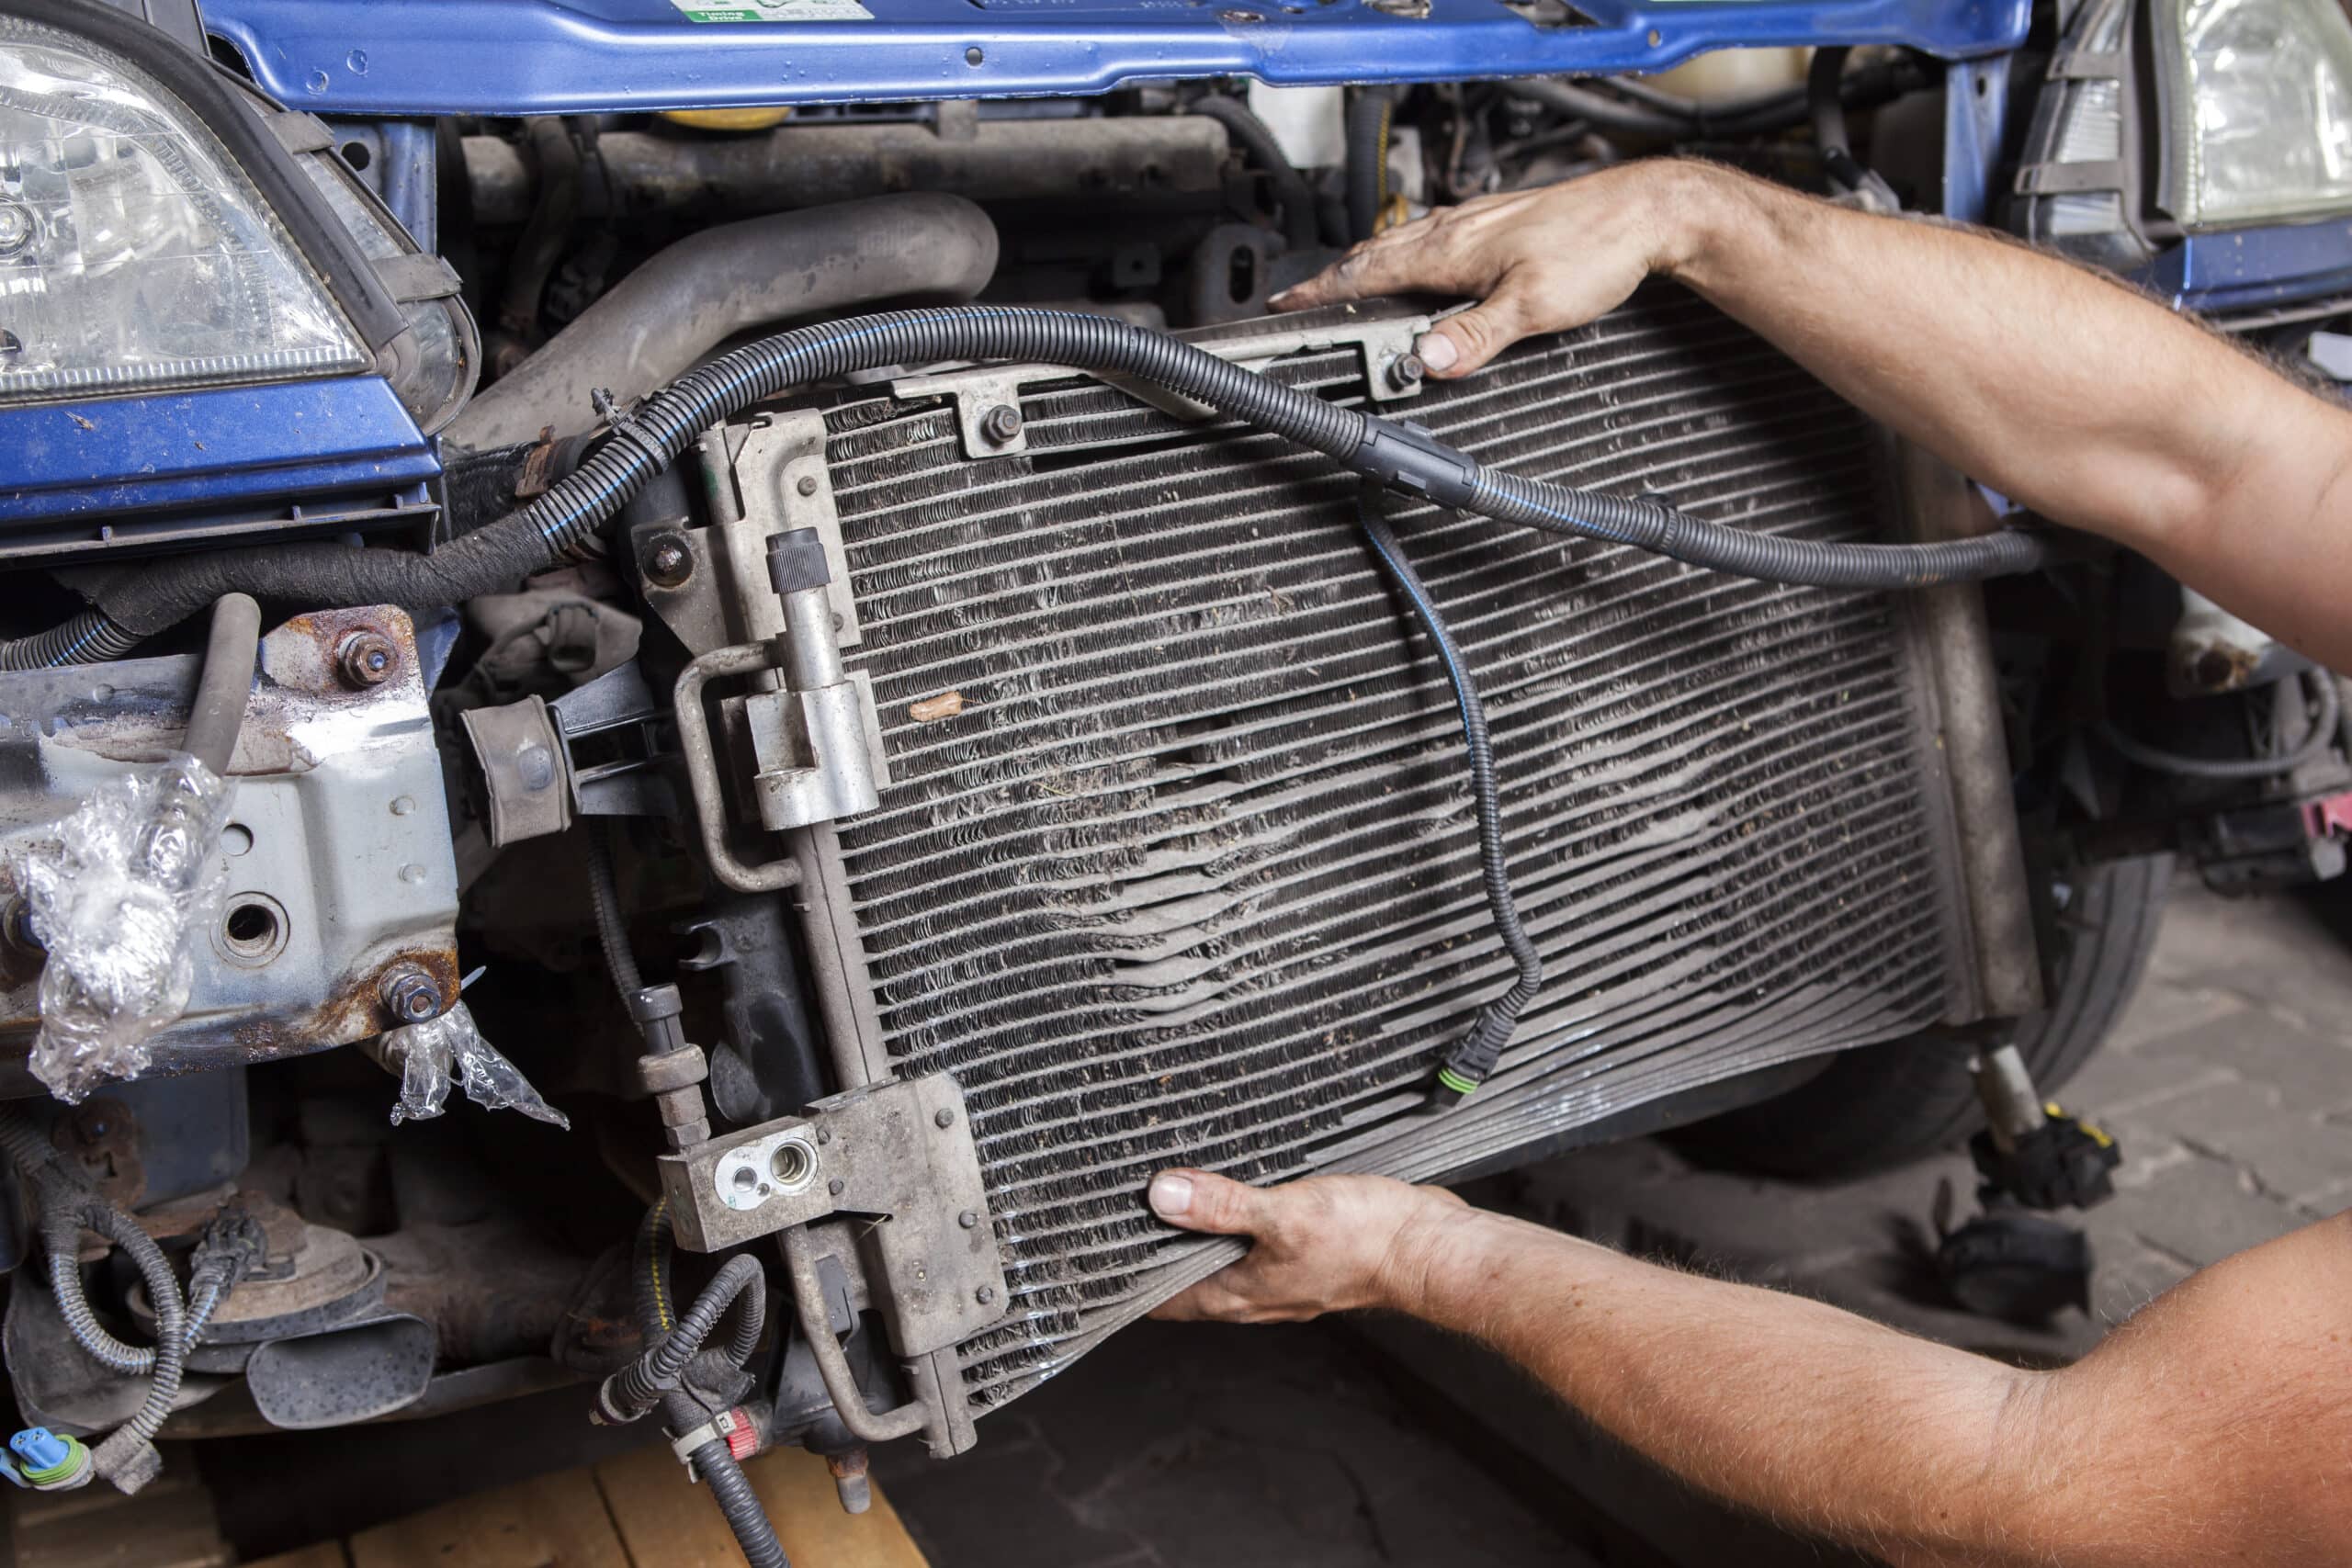
- Condenser or evaporator replacement
- Requires more labor and refrigerant evacuation. Often best for a shop.
- Compressor replacement
- Expensive and complex. Replace only after confirming no debris or oil contamination.
From my shop experience, many owners save money by replacing filters and fixing visible leaks themselves. Major tasks like compressor swaps are safer and more reliable with shop equipment.

When to call a professional
You should call a professional if you’re uncomfortable with refrigerant handling, if the compressor is noisy, or if pressure readings are abnormal. Also seek help when the evaporator or condenser needs replacement or when the system has contamination.
- Legal restrictions often prevent DIY refrigerant recovery.
- Complex electrical issues or control module faults require diagnostic tools.
- If a previous DIY recharge failed, a shop can perform leak tests and vacuum the system properly.
I once tried to repair a compressor without flushing the system. The new compressor failed quickly due to leftover debris. That taught me to avoid major repairs without professional equipment. Calling the pros can save you money in the long run.

Maintenance tips to keep your A/C working
Regular maintenance makes fixing issues easier and less frequent. Follow these simple habits to avoid big repairs.
- Run the A/C regularly, even in winter, to keep seals lubricated.
- Replace the cabin filter every 12,000 to 15,000 miles or as needed.
- Inspect belts and hoses during oil changes.
- Check for oily spots under the car and have leaks repaired quickly.
- Schedule annual A/C checks to catch problems early.
These routine steps reduce the need to urgently figure out how to fix my air conditioner in my car. Small care habits prevent big headaches later.

Frequently Asked Questions of how to fix my air conditioner in my car
Why is my car A/C blowing warm air?
Warm airflow usually means low refrigerant, a leak, or a failed compressor. Check pressures, listen for leaks, and inspect the compressor clutch.
Can I recharge my A/C myself?
You can top off minor refrigerant loss with a recharge kit if there is no leak and you know the refrigerant type. Large recharges or leak repairs are best left to professionals.
How do I find a refrigerant leak?
Use UV dye with a UV lamp, soap solution on fittings, or electronic leak detectors to find leaks. Look for oily residue near hoses and connections.
Why does my A/C make a grinding noise?
A grinding noise often indicates a failing compressor or worn bearings. Turn off the A/C and have the compressor inspected to avoid further damage.
How long does an A/C repair usually take?
Minor fixes like filter replacement or recharging can take under an hour. Major repairs like compressor or evaporator replacement may take several hours to a day.
Conclusion
You can solve many issues if you know how to fix my air conditioner in my car with simple checks and the right tools. Start with basics: fuses, filters, and visible leaks. Move on to pressure testing and repairs only if you’re confident and legally allowed to handle refrigerant. When in doubt, a certified technician will protect your car and wallet.
Take action today: inspect your cabin filter, run a quick pressure check, or schedule an A/C tune-up. If this guide helped, try the steps and share your results or questions in the comments.