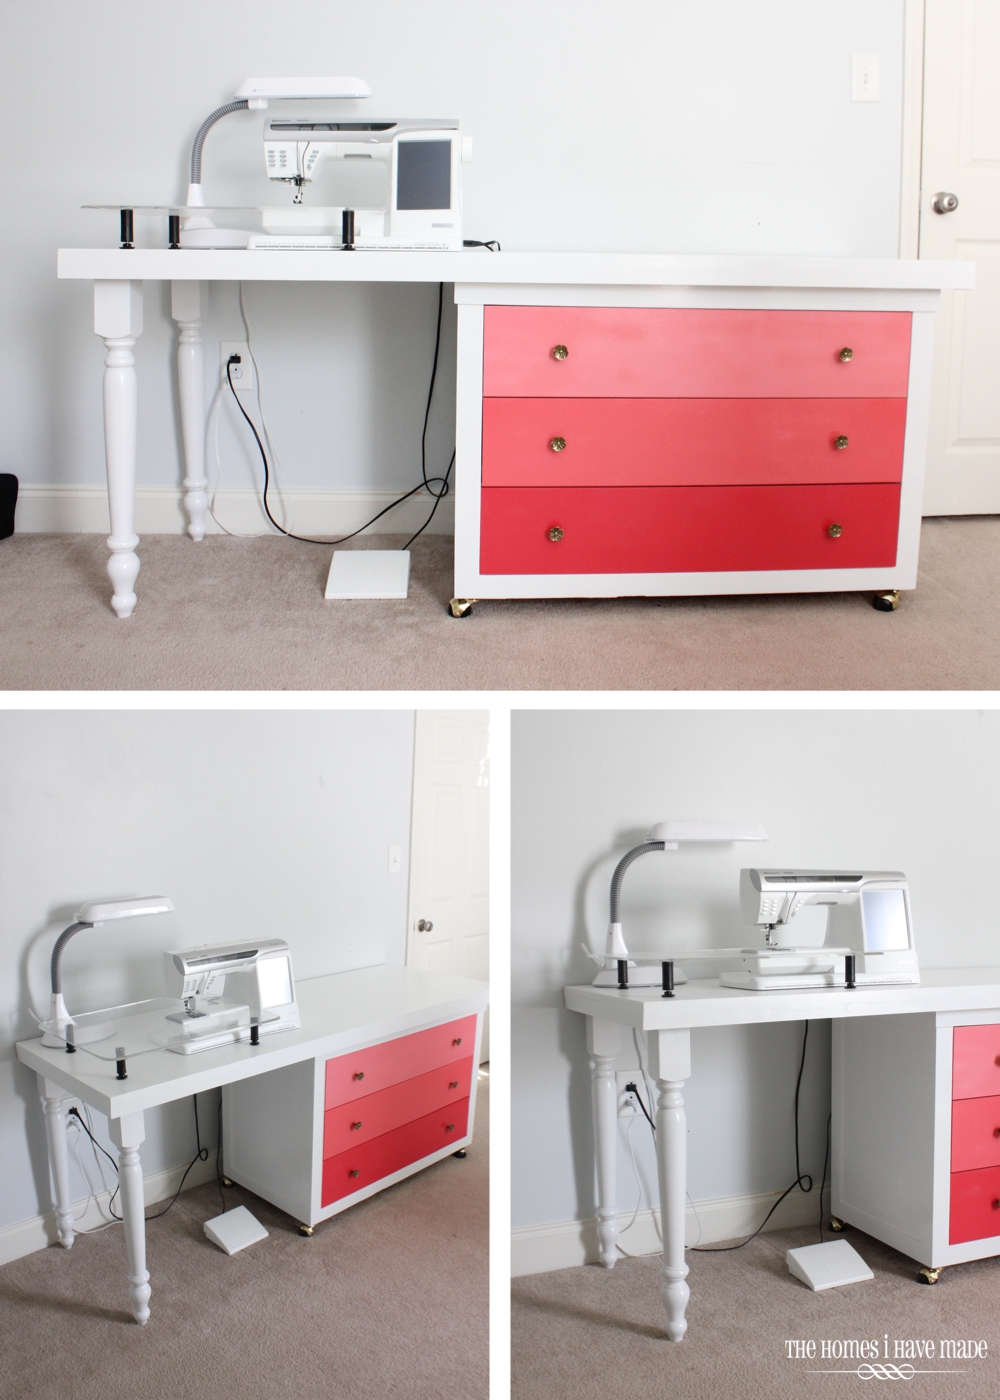
Convert a chest of drawers into a stylish, functional desk with simple cuts, a new top, and smart hardware.
I’ve turned old dressers into desks many times and I’ll walk you through each step. This guide on how to turn a chest of drawers into a desk blends clear plans, tool lists, and real tips I learned the hard way. You’ll learn how to pick the right dresser, measure for comfort, modify drawers and structure, and finish the piece so it looks and works like a real desk. Read on for a friendly, expert walkthrough that makes the project doable, even if you’re new to DIY.
Materials and tools you’ll need
Choose quality materials and the right tools. This saves time and makes the desk last.
Materials
- Chest of drawers (solid wood or high-quality veneer works best)
- New desktop surface (plywood, butcher block, or prefinished board)
- Wood screws and wood glue
- Metal brackets or angle irons
- Drawer slides (optional, if you reconfigure drawers)
- Sandpaper (80, 120, 220 grit)
- Paint or stain and sealant
- Felt pads for feet
- Cable grommet and surge protector (optional)
Tools
- Tape measure and pencil
- Circular saw or jigsaw
- Drill and bits
- Screwdriver or impact driver
- Orbital sander or sanding block
- Clamps
- Level
- Safety gear: goggles, mask, ear protection
Why these choices matter:
- Solid wood chests hold weight and accept screws well.
- Plywood top is stable and affordable.
- Brackets add strength where drawers are removed.

Planning and measurements
Good planning prevents mistakes. Measure twice, cut once.
Decide desk height
- Standard desk height is 28 to 30 inches.
- Measure your chair height and leg clearance before cutting.
Choose width and depth
- A comfortable depth is 20 to 30 inches.
- Width depends on how many drawer sections you pair. Two chests make a wide desk.
Check drawer layout
- Identify which drawers you’ll keep and which to remove.
- Leaving one or two drawers gives storage without blocking legroom.
Sketch the final layout
- Draw the front view and side view with dimensions.
- Mark locations for brackets, cable holes, and keyboard tray if you want one.
Safety check
- Ensure the chest will support desktop loads.
- Locate studs or plan floor protection for heavy setups.

Step-by-step conversion process
Follow these steps to convert a chest of drawers into a desk. I include alternate options for different skill levels.
- Prepare the chest
- Empty all drawers and clean inside.
- Remove drawer fronts if you will relocate them or reuse as panels.
- Take off any decorative trim that interferes with a flat desktop.
- Modify the drawer section
- Option A: Remove lower drawers to create legroom.
- Option B: Remove the entire middle section and add supports for a recessed knee space.
- Use a jigsaw or circular saw for careful cuts. Clean edges with sandpaper.
- Reinforce the structure
- Add wood blocks inside the chest at the top of the cavity for bracket anchoring.
- Fasten angle brackets from the inside to the underside of the desktop area for strength.
- Add or cut the desktop
- Cut your chosen desktop material to final size.
- If using a butcher block, sand and finish before installation.
- Attach the desktop using screws up through the chest top into the desktop or through brackets.
- Reconfigure drawers
- Shorten drawer boxes if they interfere with legroom.
- Reattach drawer fronts to reduced boxes or use them as faux drawers (fixed in place).
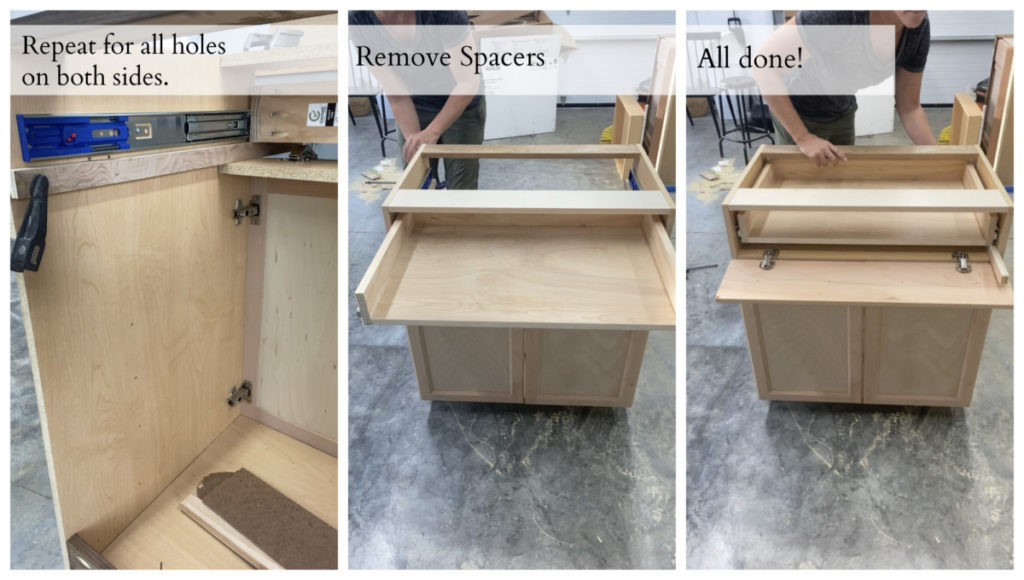
- Install new drawer slides if you rearranged drawer positions.
- Finish and protect
- Fill screw holes and sand smooth.
- Stain or paint the desk and seal with clear polyurethane.
- Install a cable grommet and add non-slip pads to base.
Personal tip: When I first tried this, I underestimated reinforcements. Heavy monitors need solid bracket attachment. Use metal brackets and glue for long-term stability.

Finishing touches and styling
Small details make a big difference. These touches turn a DIY desk into a polished piece.
Surface treatments
- Paint for a modern look. Use primer first on veneer.
- Stain for a natural wood finish; seal with satin polyurethane.
Hardware upgrades
- Replace old knobs with modern pulls or leather handles.
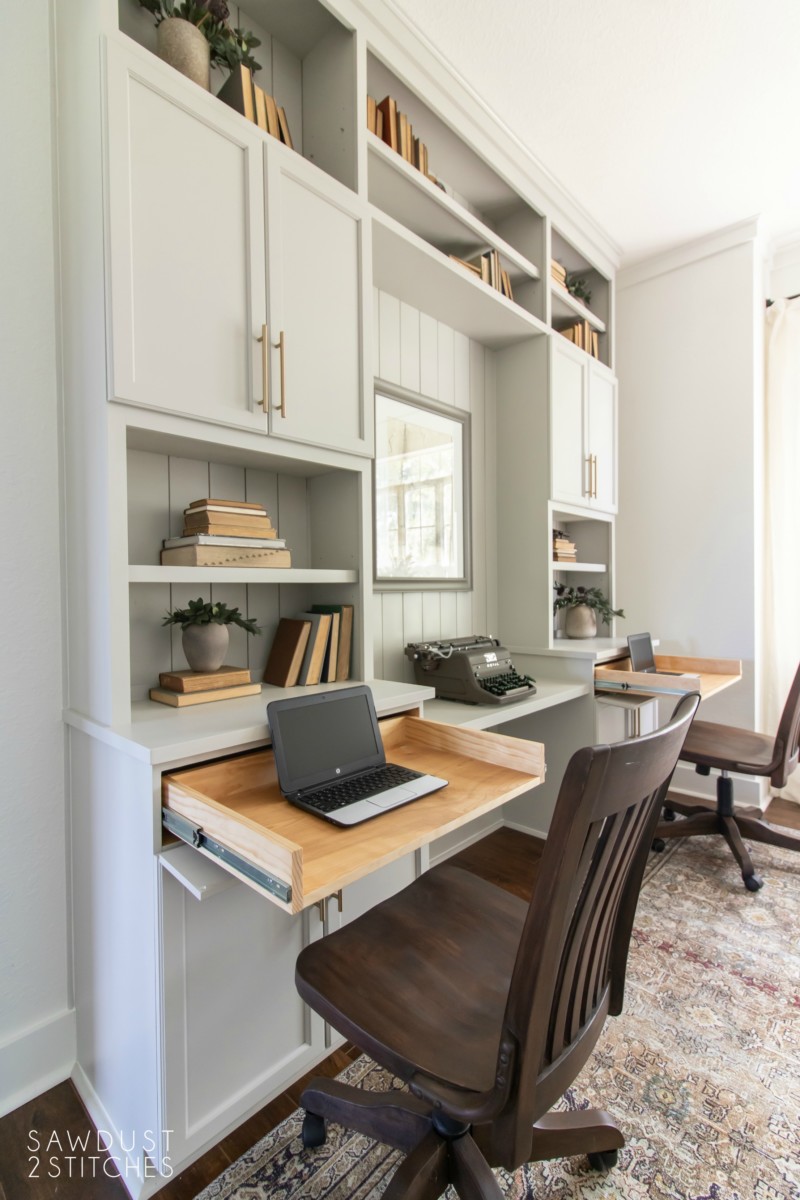
- Add a keyboard tray under the desktop for ergonomic use.
Cable management
- Drill a grommet hole for cables near the back.
- Use adhesive cable clips inside drawers to hide chargers.
Ergonomics and comfort
- Place monitor at eye level; use a riser if needed.
- Ensure 24 inches of knee clearance for most users.
Styling tips
- Add a desk lamp and a small plant.
- Use one side for storage and one side for work, balancing visuals and use.
My favorite trick: repaint the inside of removed drawers a contrasting color. It looks intentional and modern.
Maintenance and safety
Keep your converted desk safe and long-lasting with simple care.
Regular checks
- Tighten screws every 3 months.
- Inspect brackets for movement after heavy use.
Cleaning
- Dust weekly and wipe spills immediately.
- Use wood cleaner for stained surfaces; mild soap for painted finishes.
Safety practices
- Anchor tall chests to the wall to prevent tipping.
- Avoid placing extremely heavy equipment on unsupported parts.
Limitations to note
- Not all chests are suitable for heavy loads.
- Veneer chests may peel when cut; use thin plywood top instead.
Cost and time estimates
A realistic estimate helps you plan the project and budget.
Budget ranges
- Low-budget: $50 to $150 using thrifted chest and plywood top.
- Mid-range: $150 to $400 with new desktop and quality hardware.
- High-end: $400+ for butcher block and custom finishes.
Timeframe
- Prep and planning: 1 to 2 hours.
- Cutting and reinforcement: 2 to 4 hours.
- Painting, staining and drying: 24 to 48 hours depending on coats.
- Total hands-on time: 4 to 8 hours spread over a few days.
I once converted a thrift-store chest for $75 in one weekend. The most time-consuming step was waiting for paint to dry.

Personal tips and common mistakes
Learn from my trial and error. These tips save time and improve results.
Tips from experience
- Choose a chest with a flat top and square sides. It makes aligning the desktop easy.
- Mark all cut lines twice. Accuracy matters more than speed.
- Test-fit the desktop dry before final fastening.
Common mistakes to avoid
- Rushing reinforcements; under-braced tops sag over time.
- Ignoring ergonomics; a too-high or too-low desk ruins comfort.
- Painting without proper prep; primer prevents peeling.
Anecdote: I once attached a top without adding blocks. After a month, one corner sagged. I fixed it with hidden cleats and never skipped that step again.

Frequently Asked Questions of how to turn a chest of drawers into a desk
How do I choose the best chest for conversion?
Pick a solid wood or sturdy particle board chest with a flat top. Avoid heavily curved fronts or fragile veneers that peel when cut.
Can I use two dressers to make a longer desk?
Yes. Place two chests apart and bridge them with a single top. Reinforce the middle with cleats to prevent sagging.
Do I need to remove drawers to make legroom?
Not always. You can shorten drawer boxes or remove only the lower drawers to create a knee space. Plan based on desk height and chair size.
What desktop material works best?
Plywood topped with veneer or a butcher block works well. Butcher block is sturdy but heavier and costlier than plywood.
How do I keep the desk from tipping?
Anchor the chest to the wall using furniture straps or brackets. This is crucial for tall or top-heavy pieces.
Can I add a keyboard tray?
Yes. Mount a sliding keyboard tray under the desktop if there is space. Ensure drawer or bracket placement does not interfere.
Is painting a chest better than staining?
It depends on the look. Paint covers blemishes and is forgiving, while stain highlights natural wood but requires a nicer surface.
How do I manage cables with limited drawer space?
Use a grommet in the desktop and adhesive clips inside drawers to route cords neatly. A small power strip mounted inside a drawer works well.
Will cutting the chest reduce its value?
It might for antique or designer pieces. Avoid cutting valuable antiques; instead, look for modern or thrift chests for projects.
Do I need special skills to do this?
Basic woodworking skills and tools are helpful. Many steps are simple with careful measuring and patience.
Conclusion
Turning a chest of drawers into a desk is a rewarding project that adds function and style to your space. You can do this with modest tools, a clear plan, and attention to reinforcement and ergonomics. Start by choosing a suitable chest, measure carefully, and take your time with cuts and finishes. Try one small project first, and build confidence as you go.
Take action: pick a chest, sketch your plan, and set aside a weekend to convert it. Share your results or ask questions below — I’d love to hear how your desk turns out.