Is your shower head constantly dripping, wasting water, and driving you crazy? A leaky shower head might seem like a small problem, but it can lead to higher bills and even damage over time.
The good news is, you don’t have to call a plumber or spend a fortune to fix it. You’ll discover simple, effective steps to stop your shower head from leaking—saving you money and hassle. Keep reading, and you’ll have your shower working perfectly again in no time.
:max_bytes(150000):strip_icc()/how-to-fix-a-leaking-shower-head-4154274-hero-96869029aa204b64abe6ecc27bd82d55.jpg)
Credit: www.thespruce.com
Common Causes Of Leaky Shower Heads
Leaky shower heads cause water waste and increase bills. Understanding common causes helps fix leaks fast. Many leaks result from simple issues you can solve yourself. Check the parts and look for damage or dirt. Fixing these problems stops the drip and saves water.
Worn Out Washers
Washers stop water from leaking around joints. Over time, washers wear out or crack. Old washers cannot seal the water flow well. Replace worn washers to stop leaks quickly.
Loose Connections
Shower heads connect to pipes with screws and joints. These connections can loosen from use or vibration. Loose connections let water escape and cause drips. Tighten all joints firmly to fix leaks.
Damaged Seals
Seals keep water inside the shower head parts. Seals may crack or break after long use. Damaged seals let water leak out slowly. Changing broken seals improves the shower’s water tightness.
Mineral Buildup
Hard water leaves minerals inside the shower head. These minerals block water flow and damage parts. Mineral buildup causes leaks by breaking seals or washers. Cleaning the shower head removes minerals and stops leaks.
Tools And Materials Needed
Fixing a leaky shower head requires a few simple tools and materials. Having the right items ready makes the job easier and faster. These tools help you take apart the shower head and replace worn parts.
Gather everything before you start. It saves time and prevents interruptions. Here are the key tools and materials you will need.
Wrenches And Pliers
Wrenches and pliers help loosen or tighten nuts and bolts. An adjustable wrench fits most sizes. Pliers give a strong grip on small parts. Use them carefully to avoid damaging the shower head.
Replacement Washers And Seals
Washers and seals stop water from leaking. Over time, they wear out or break. Having new washers and seals ensures a tight fit. Check your shower head size to buy the right replacements.
Teflon Tape
Teflon tape wraps around pipe threads. It creates a water-tight seal. This tape is easy to apply and prevents leaks. Wrap it around threads before reconnecting parts.
Vinegar For Cleaning
Vinegar removes mineral buildup and dirt. Soak parts in vinegar to clean them. This natural cleaner helps water flow smoothly. Rinse well after soaking to avoid damage.
Step-by-step Repair Guide
Fixing a leaky shower head saves water and money. The process is simple and takes little time. Follow these clear steps to stop the leak and get your shower working well again.
Turn Off Water Supply
Locate the main water valve for your home. Turn it off to stop water flow to the shower. This step prevents water from spraying during repair.
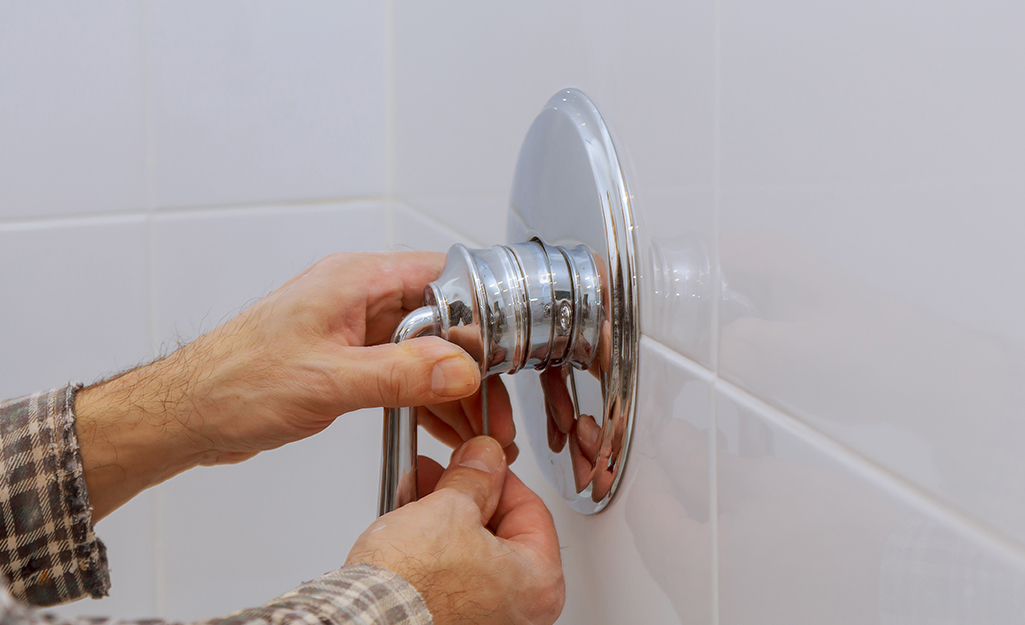
Remove The Shower Head
Use a wrench or pliers to loosen the shower head. Turn it counterclockwise until it comes off. Keep a cloth handy to protect the fixture from scratches.
Inspect And Replace Washers
Check the rubber washers inside the shower head. Old washers often cause leaks. Remove worn washers and replace them with new ones of the same size.
Clean Mineral Deposits
Soak the shower head parts in vinegar for about 30 minutes. This removes mineral buildup that blocks water flow. Use a brush to scrub away any remaining deposits.
Reassemble And Tighten
Put the washers back in place. Screw the shower head onto the pipe by turning clockwise. Use a wrench to tighten it gently, avoiding over-tightening.
Test For Leaks
Turn the water supply back on. Check the shower head for any drips or leaks. If water still leaks, repeat the steps or check for damage in the pipe.
Preventive Tips To Avoid Future Leaks
Preventing leaks in your shower head saves water and money. Small steps help keep your shower working well. Follow these tips to avoid future drips and leaks.
Regular Cleaning
Clean your shower head often. Dirt and mineral build-up cause leaks. Use a soft brush to remove grime. Soak the shower head in vinegar to clear mineral deposits. Regular cleaning keeps water flowing smoothly.
Check Connections Periodically
Look at the shower head connection regularly. Tighten loose parts to stop leaks. Use plumber’s tape on threads to create a better seal. Early checks prevent bigger problems later.
Use Water Softener
Hard water causes mineral build-up and damage. Install a water softener to reduce minerals. Softer water helps your shower head last longer. It also lowers the chance of leaks.
Replace Old Fixtures
Old shower heads wear out and start leaking. Change them every few years for best results. New fixtures work better and use less water. Upgrading prevents leaks and keeps your shower fresh.
When To Call A Professional
Knowing when to call a professional for a leaky shower head saves time and prevents damage. Some leaks are easy to fix, but others need expert help. A plumber can find hidden problems and fix them safely.
Persistent Leaks After Repairs
Leaks that continue after you try to fix them need a professional. Small repairs may not solve deep issues. A plumber can spot worn-out parts or hidden cracks. They will use the right tools to stop the leak completely.
Damaged Plumbing
Leaks caused by broken pipes require expert care. Damaged plumbing can lead to water waste and mold. Professionals know how to repair or replace pipes safely. They prevent bigger problems that can cost more later.
Complex Shower Systems
Modern showers with multiple heads or jets can be tricky. Complex systems have many parts that may leak or clog. A professional understands these systems well. They can fix leaks without breaking the shower or plumbing.
Credit: www.homedepot.com
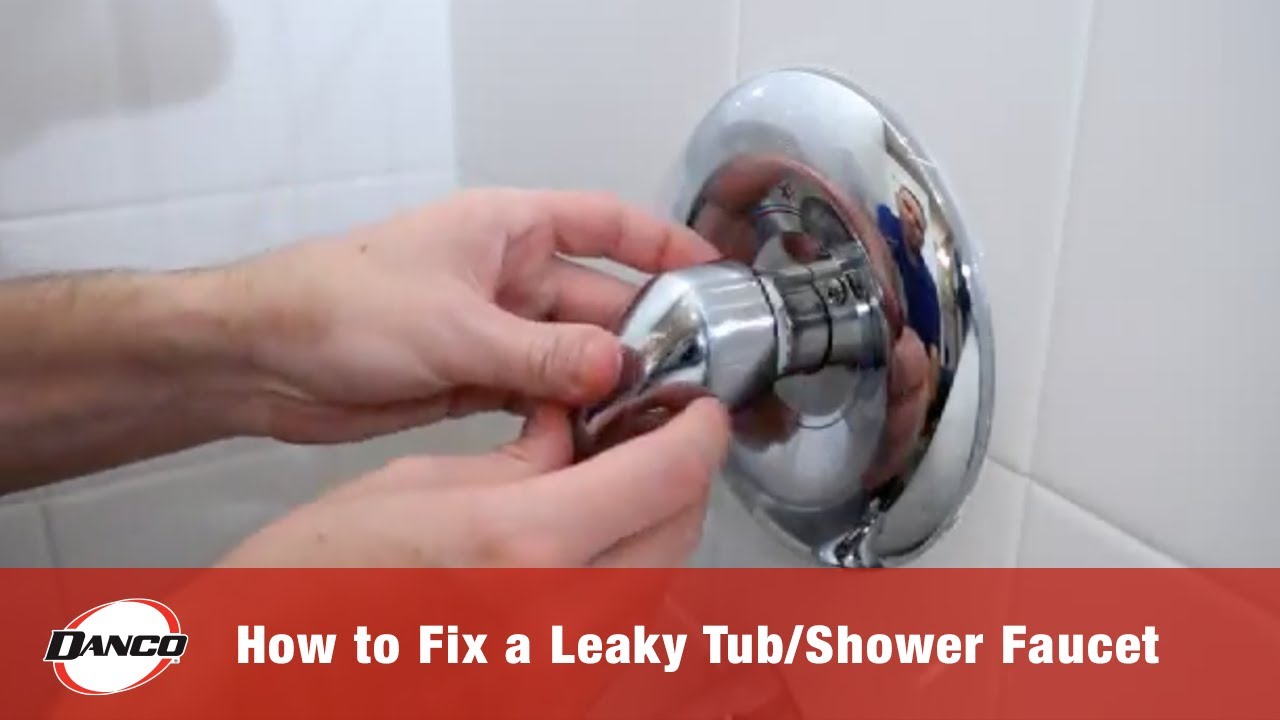
Credit: www.youtube.com
Frequently Asked Questions
How Do I Fix A Leaking Shower Head?
First, turn off the water supply. Remove the shower head and check the washer. Replace worn washers or seals. Clean mineral deposits with vinegar. Reattach and test for leaks.
What Causes A Shower Head To Leak?
Leaks often result from worn washers, damaged seals, or mineral buildup. High water pressure and corrosion can also cause leaks in shower heads.
Can I Stop A Shower Head Leak Without Tools?
Yes, you can use vinegar to dissolve mineral buildup. Soak the shower head in vinegar for an hour. This often stops minor leaks without needing tools.
How Often Should I Replace Shower Head Washers?
Replace washers every 6 to 12 months, or when leaks appear. Regular replacement prevents leaks and maintains water efficiency.
Conclusion
Stopping a leaky shower head saves water and money. Small fixes like tightening or replacing parts work well. Check washers and seals for damage. Clean mineral buildup to improve flow. Regular care keeps your shower working right. Quick repairs prevent bigger problems later.
You can handle this easily with basic tools. Enjoy a drip-free shower and lower bills. Simple steps make a big difference at home.