Are you looking for a creative way to add a personal touch to your home decor? Making a macrame wall hanging with a mirror is a fun and simple project you can do yourself.
Not only does it bring a cozy, handmade feel to any room, but the mirror adds a bright, stylish twist that catches the eye. In this guide, you’ll learn easy steps to create your own beautiful macrame wall art, even if you’ve never tried macrame before.
Ready to transform your space with a unique piece that shows off your style? Let’s get started!
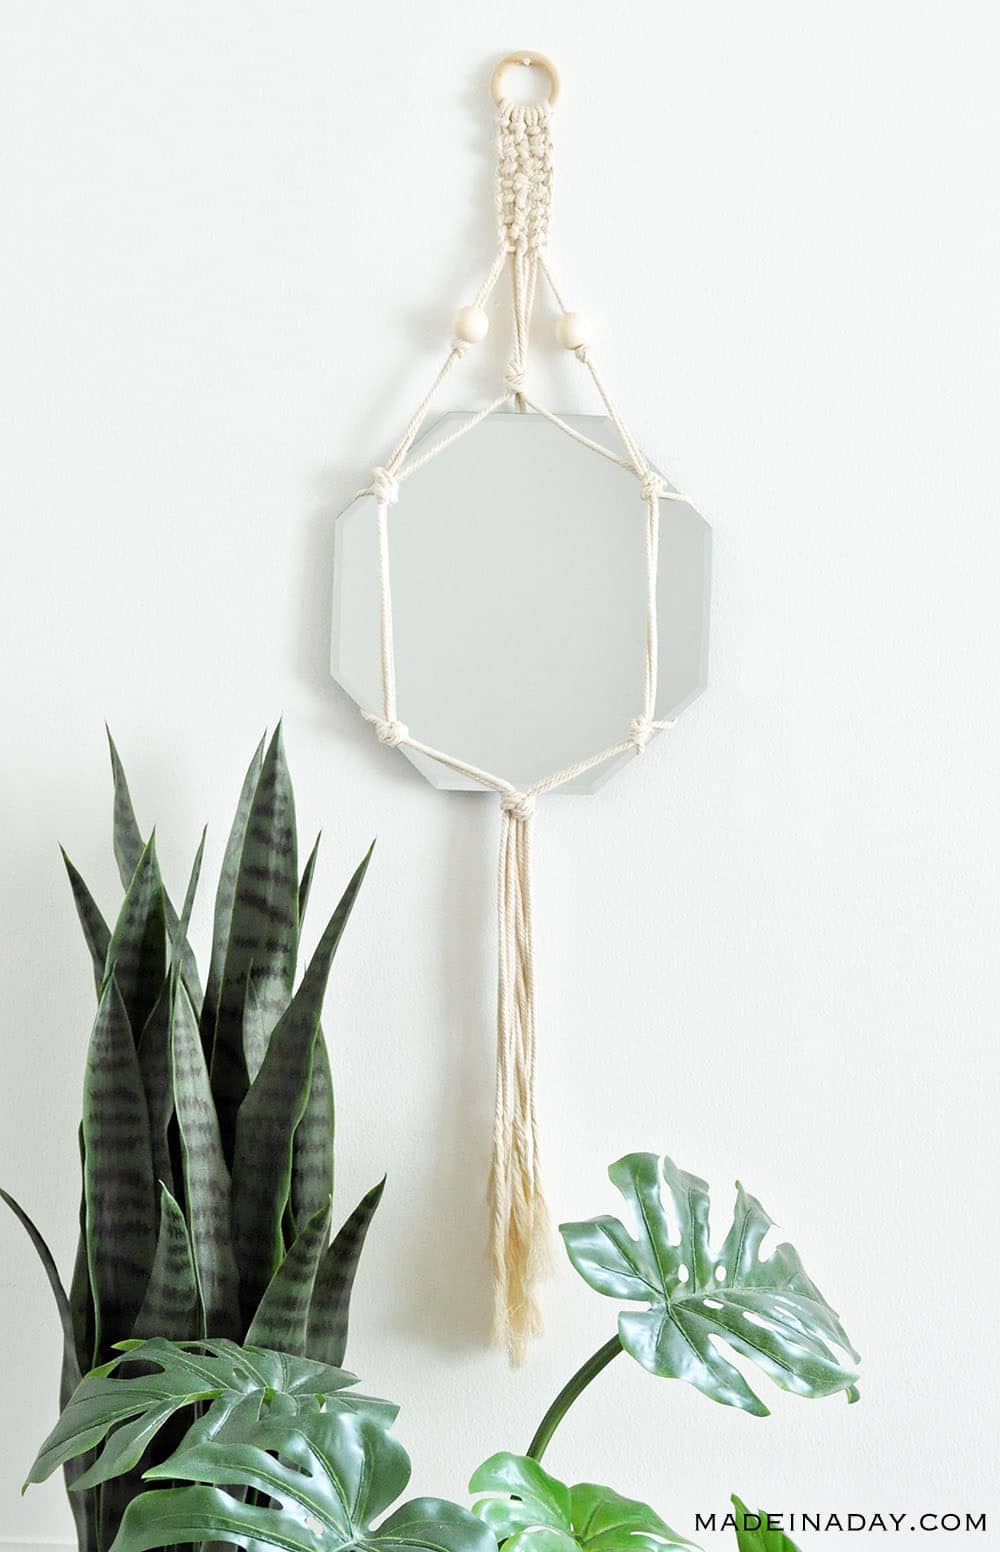
Credit: madeinaday.com
Materials Needed
Creating a macrame wall hanging with a mirror needs the right materials. Choosing the best supplies makes your project easier and more beautiful. This section covers the essential items to gather before starting.
Choosing The Right Cord
Pick a strong and soft cord for easy knotting. Cotton cord works well and feels nice to touch. The thickness should be around 3 to 5 mm for good texture. Avoid cords that fray or feel rough on your hands. Natural colors or dyed cords both look great with mirrors.
Selecting The Mirror
Choose a mirror that fits your wall space and design. Round or oval mirrors add a soft look. Small to medium sizes work best for macrame. Make sure the mirror has a frame or edge to tie the cords around. Lightweight mirrors are easier to hang safely.
Additional Tools
Gather scissors to cut the cord cleanly. Use a tape measure to check lengths precisely. A wooden dowel or metal ring helps hold the cords in place. Clips or pins can keep knots tight while working. A comb or brush helps finish the fringe neatly.
Preparing The Mirror
Preparing the mirror is a key step before starting your macrame wall hanging. A clean and sturdy mirror will make your project look neat and last longer. Taking time to get the mirror ready helps your work stay secure and beautiful.
Cleaning And Securing
First, clean the mirror thoroughly. Use a soft cloth with glass cleaner. Remove all dust, fingerprints, and smudges. A clean surface helps glue and knots stick well.
Next, check the mirror edges. Make sure they are smooth and not sharp. Use tape on sharp edges to protect your hands and macrame cords. This step prevents damage during crafting.
Attaching A Base Frame
Attach a base frame to give the mirror support. Use a wooden or metal frame that fits around the mirror. Secure the frame with strong glue or small nails. The frame holds the mirror firmly in place.
This frame will be the foundation for your macrame knots. It helps keep the mirror steady while you work. Choose a frame that matches your wall hanging style for a nice finish.
Basic Macrame Knots
Basic macrame knots build the foundation of your wall hanging. These knots create patterns and shapes. They hold the cords tightly and add texture. Learning these knots helps you work with ease and confidence. Each knot has a simple method. Practice each one slowly to get the best result.
Lark’s Head Knot
The Lark’s Head Knot is the first knot to learn. It attaches cords to the ring or dowel. Fold the cord in half. Place the loop behind the ring. Pull the ends through the loop. Tighten the knot around the ring. This knot holds the cords firmly in place.
Square Knot
The Square Knot is common in macrame art. It creates flat, strong patterns. Use four cords for this knot. Cross the left cord over the middle two. Then, bring the right cord over the left. Pull both ends tight. Repeat, starting with the right cord this time. This knot looks neat and works well for designs.
Half Hitch Knot
The Half Hitch Knot makes curves and lines in your design. Take one cord as the holding cord. Wrap another cord around it from front to back. Pull the wrapping cord tight. Repeat this to form a row of knots. This knot adds detail and flow to your wall hanging.
Designing The Pattern
Designing the pattern is the first step in making a macrame wall hanging with a mirror. It helps you visualize the final look and plan your knots carefully. A good design balances the mirror and the macrame around it. This makes the piece both beautiful and sturdy.
Sketching Your Layout
Start by drawing a simple sketch of your wall hanging. Use a pencil and paper to outline the shape and size. Mark where the mirror will go in the center. Add details like the type of knots and fringe length. This guide will help you stay organized while crafting. Keep the sketch clear and easy to follow.
Incorporating The Mirror
Think about how to hold the mirror in place with knots. Choose strong knots like square knots or lark’s head knots around the mirror edges. Make sure the mirror fits snugly without gaps. Add extra knots below the mirror for support. The mirror should feel secure and not move when touched.
Step-by-step Knotting Process
The step-by-step knotting process is the heart of making a macrame wall hanging with a mirror. It guides you from simple cord setup to adding beautiful details. Each step builds on the last, so follow carefully. This method helps create a strong and pretty design that holds the mirror well.
Setting Up The Cord
Start by cutting several long cords. The length depends on your wall hanging size. Fold each cord in half and attach them to a wooden dowel or ring using a lark’s head knot. Space the cords evenly. This setup forms the base for your knots and mirror frame.
Creating The Base Rows
Make square knots along the cords to form a firm base. Use four cords at a time. Cross the outer cords over the middle ones and pull tight. Repeat this pattern in rows. This creates a grid that supports the mirror securely.
Adding Decorative Elements
Incorporate spiral knots or diagonal patterns for style. Add beads or smaller cords for texture. Carefully knot around the mirror’s edge to hold it in place. These details make your wall hanging unique and eye-catching.
Attaching The Macrame To The Mirror
Attaching the macrame to the mirror is an important step. It makes your wall hanging look neat and stay secure. This part takes patience and care. The knots must be tight and hold well. The macrame should not slip or fall off the mirror. Follow these tips to attach your macrame with strength and style.
Securing The Knots
Start by tying strong knots around the mirror frame. Use square knots or lark’s head knots for a firm grip. Pull the cords tight but not too hard to avoid damaging the mirror. Double knotting can add extra security. Check each knot to make sure it does not loosen. This keeps the macrame stable and neat.
Ensuring Stability
Balance the macrame evenly on all sides of the mirror. Spread the cords so weight is shared equally. Avoid putting all tension on one side. Test the hanging by gently shaking the mirror. Adjust knots or cords that feel loose. Use small hooks or adhesive strips for more support if needed.
Finishing Touches
Finishing touches make your macrame wall hanging with a mirror look complete. They give your piece a neat and polished look. Small details can change the whole design.
These final steps help your wall hanging stand out. They add character and charm. Take your time to perfect them.
Trimming And Styling Fringe
Cut the fringe evenly for a clean look. Use sharp scissors for smooth edges. Trim little by little to avoid mistakes.
Style the fringe by combing or shaping it. Straighten the threads with your fingers. You can create a simple straight cut or angled edges.
Fringe style changes the vibe of your wall hanging. Soft, flowing fringe feels relaxed and natural. Sharp cuts make it look modern and neat.
Adding Beads Or Embellishments
Beads add color and texture to your macrame. Choose wooden, glass, or metal beads for different styles. Slide beads onto cords before tying knots.
Place beads at the ends or in the middle of patterns. They highlight key areas and draw attention. Use embellishments like feathers or shells for extra flair.
Keep it simple to avoid overcrowding the design. Too many beads can distract from the mirror. Balance is key for a beautiful finish.
Hanging And Display Tips
Hanging and displaying your macrame wall hanging with a mirror can change the look of any room. Proper placement and mounting make your art stand out. It also keeps your piece safe and secure. Follow these tips to show off your creation beautifully.
Choosing The Perfect Spot
Pick a wall with good light to brighten the mirror. Avoid direct sunlight to prevent fading of the fibers. A plain wall helps the macrame design pop. Spaces like living rooms, bedrooms, or hallways work well. Make sure the spot is at eye level for best view.
Mounting Techniques
Use a strong hook or nail to hold the weight. If the wall is drywall, consider anchors for extra support. Hanging from a wooden dowel or rod keeps the shape neat. Use a level tool to keep the piece straight. Check stability often to avoid accidents.
Troubleshooting Common Issues
Troubleshooting common issues helps keep your macrame wall hanging neat. Small problems can spoil your work. Fixing them early saves time and stress. The mirror adds weight and needs careful handling. You must check knots and edges often. This guide shows easy fixes for common problems.
Fixing Loose Knots
Loose knots make your design look messy. They can cause the wall hanging to fall apart. Tighten each knot by pulling both ends firmly. Use your fingers to push the knot closer. If the knot slips, untie and retie it tightly. Try to keep equal tension on all strands. This keeps your knots secure and even.
Dealing With Uneven Edges
Uneven edges make your wall hanging look unbalanced. Cut the ends straight with sharp scissors. Measure the length before cutting to keep symmetry. Pull the cords gently to straighten the edges. Use a comb to align strands before trimming. Check edges in good light for accuracy. This simple step gives your piece a clean finish.

Credit: www.youtube.com

Credit: liagriffith.com
Frequently Asked Questions
What Materials Are Needed For Macrame Wall Hanging With Mirror?
You need macrame cord, a wooden or metal ring, a small mirror, scissors, and a tape measure. Optional beads or embellishments enhance the design. Choose durable, natural cords like cotton for best results.
How Do I Attach The Mirror To The Macrame Piece?
Secure the mirror inside the ring using strong adhesive or wire. Ensure it fits snugly and is stable. The macrame knots around the ring will also help hold the mirror in place.
What Basic Knots Are Used In Macrame Wall Hangings?
Common knots include the lark’s head, square knot, and half hitch. These create patterns and structure for the hanging. Learning these knots is essential for crafting a beautiful macrame wall hanging.
How Long Does It Take To Make A Macrame Mirror Hanging?
It typically takes 2 to 4 hours, depending on skill level and complexity. Beginners may need more time to practice knots and measurements. Planning and preparation can speed up the process.
Conclusion
Creating a macrame wall hanging with a mirror adds charm to any room. The steps are simple and fun to follow. You only need basic materials and a little patience. This craft lets you express your style in a unique way.
Each piece will look different and special. Try different knots and patterns to find what you like. Hang your finished work where it can catch the light. Enjoy the beauty and warmth it brings to your space. Keep practicing to improve your skills every time.
Crafting can be relaxing and rewarding. Give it a try today!